
Electroforming
The book gives an overview about electroforming, but does not give basic steps to accomplish this technique. Below is more information from two artists.
Solutions to electroform copper is Safer Solutions - today's soltuion instead of silver paint.
TOC
HeeJoo Kim
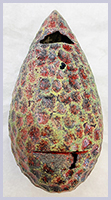
In August 2019 I attended The Enamelist Society Conference and took a class from HeeJoo Kim from Korea. To the right is one of her samples - carved in wax, electroformed with copper, and painted with Thompson Acrylic Enamel Paints.
Here is what I learned....
One can electroform a wax form or an organic such as bark from a tree, an acorn, etc. In all cases, after the forming is done, you will need to burn out the original. Thus, if you want to make multiples of the shape, you need to make a re-useable mold and then electroform something made from the mold.
We used a setup with a digital controller from Rio Grande that was developed by Sherri Haab. This setup also allows for electroetching, which is described in full in the book. But a set up for just electroforming is also available (a bit less expensive). We electroformed using copper, but other metals are possible. Below are my basic steps for copper electroforming and enameling. Here is a video of the process.
Overview
In class we did some wax carving, but I found the organic much more exciting. Basic steps:
- Create your study (wax image or organic, possibly made from mutiple pieces hot waxed together)
- Seal organics with water based varnish to ensure it doesn't leak anything. This comes with the kit.
- Attach a copper wire (about 16 ga) that will bring electricity to the piece to electroform. To do this, drill/file a long indent where the wire will go and use hot wax to secure it in place. The wax used can be soft or hard wax, whatever will melt via an alcohol lamp to secure the wire.
- Paint your study with metallic paint that conducts electricity (comes with the kit, but we used a better paint in class - it was from Korea and cannot be purchased here).
- Put your piece in the electroforming setup and hook up according to the directions. The electroforming process take 24-36 hours! The current can be adjusted. We started off low (.5) to ensure a good bond, but then went higher after about 3-4 hrs to about .75. The higher the current, the more "knobby" the piece gets. I happen to like the knobby look and did one of each. I'm sure at home I'll turn the current up up up - to about 1.5 - 1.7 to get the knobby look. it's nice to know you can get different textures on your metal.
- After the electroforming is done, burn out the wax or organic.
 Wax was the easiest - if it's all covered with paint (you didn't leave any open spaces), you need to drill one hole for the wax to drip out at the bottom and a couple of holes for ventilation spots. You heat starting from the bottom of the piece so that the lower wax burns out before you get to the top of the piece.
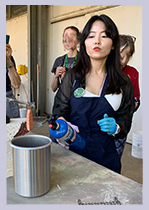
 - See the set up to the right with HeeJoo demonstrating and below for a closer look of the setup. Notice the pot to catch the molten wax and other debris. We also had a pot of water near by. Any torch can be used; this was a Bernzomatic.

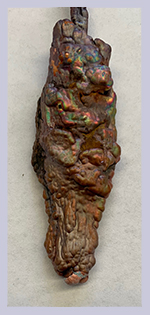
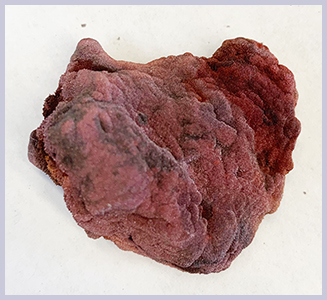
- The organics aren't fully covered by metallic paint (and when done, copper) as they have to be burned out without melting through a hole. My first piece of bark didn't pop out and only charred so I used a pick to get it out (which worked great) - the piece was "flame painted" by the torch and I loved it so much I have to see if I'll leave it like that (see image on left with the copper wire used to hold it in the bath still attached). My second piece totally burned out and popped out of the piece so the pot of water was needed! See the image on the right - see how knobby it is compared to the 1st one - this shows the difference between a low current (on left) and a high current (on right). These do not show relative size as the image on the right is WAY bigger than in real life.
Enameling
Once the piece is electroformed, it is cleaned like any other metal for enameling.
In class we used the Thompson Acrylic Enamel Paints which was the first time I had used these. They can be mixed to form other colors, just as regular paint. We fired them at 1300°F for about1 minute, but the Thompson site says they fire at 1450°F. We did have a bit of issues with firing in class, so try them both ways.
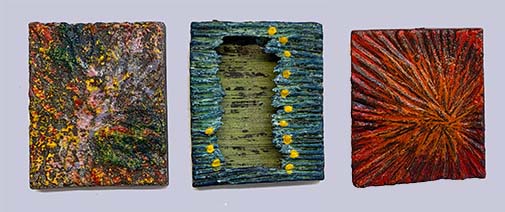
We brushed them on and also dabbed with a sponge. HeeJoo told us to give do this for about 3 coats. HeeJoo gave us rectangular pieces that she had electroformed from carved wax, to use for painting. I didn't want to use my pieces so I can think about what to do with them. Here are the pieces I painted. The one with the hole was where there was no metallic paint before the electroforming process - I like it as a shadow box to put in a photo or something.
 I plan to use grain enamel to enamel my organic forms, but I'll see when I decide what to do with them.
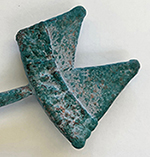
Here isa piece done by Irene Mori - we all thought it looked like an ancient Roman artifact. She's not sure what she'll do with it at this point, but it sure is pretty. This was from a wax carving. Note that the wire to hold it into the electroforming solution is still attached and Irene enameled it (wish I had enameled mine!).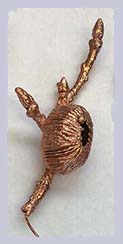
Here is a piece, not yet finished, by Krisztina Vegenas of an organic collage put together by wax and then electroformed.
All in all it was a lot of fun and I was inspired to take this class from having included it in my book. I hope my book inspires you, too, to add to your creativity.
Rachel Shimpock
Rachel is a jeweler working in electroforming. She has some instructional information on her site. She seems to work differently than HeeJoo and her talk to The Enamelist Soceity zoom meeting in Sept 2020 was very interesting. The main thing that interested me was electroforming an already enameled piece.