
This chapter discusses how to fire enamels in a kiln. Torch firing is discussed in the project by that name. There are two Learn the Technique mini-projects: how to fire your first layer of a transparent enamel directly on copper and a high firing technique, which we call HIgh Firing Webbing Design. The high firing technique can be accomplished in more than one way - the book discusses one way, but I've found another that didn't make it into the book so that is listed here.
TOC
- High Fire Webbing Design
- Small kiln
- Firing Furniture
High Fired Webbing Design
The High Fired Webbing Design is based on Pull-Through where the bottom layer of enamel is visible through the next layer(s). This can be achieved in a few ways. The book discusses the various ways for Pull-Through. It also lists the High Fired Webbing Design (by Trish White) using a leaded enamel base with at least one un-leaded enamel over that. But the High Fired Webbing Design can also be achieved using all un-leaded enamels, IF the base is very soft. This update listed below only discusses Thompson enamels as I'm not familiar with most of the other brands.
One such soft enamel by Thompson is 2008 (named Crackle Base Clear), a soft fusing clear transparent, which was formulated as a base to be used with the Liquid Form Enamels (LFE, ex: 533 white), which used to be called the Crackle Enamels. However, of course it can be used by itself without the LFEs. 2008 is called Clear Crackle Base. But note: unless it is used with the Liquid Form Enamels, any use of it should not be called Crackle Enamel as for that name, one of the Liquid Form Enamels needs to be used.
That being said, let me tell you that there is confusion between Separation Enamel, Pull-Through, Crackle Enamel and HIgh Fire. This is address in the book and will not be discussed here. These are all different, are achieved differently via different reactions (chemical or otherwise), and actually don't look alike if you are familiar with all four. The book shows side by side photos of these so you can see the differences.
Back to High Fire Webbing Design. Trish and I made up this name just to be able to give it a name because other forms of high firing produce other results. Ex: if you overfire Thompson Hunter Green opaque enamel you will probably get a turquoise; overfired white usually shows some green and maybe blue, etc. These have nothing to do with the Webbing Design.
Consider the information like a blog as I have already been adding various testing results that I have done. There is a lot to figure out in this new form of enameling and most of it is all really nice!
5/2019
I tested using 2008 in three ways:
- With 2008 as the base and other unleaded enamels over it
- With 2008 as the base and Liquid Form Enamel (crackle) over that and then another layer of an unleaded enamel
- With a base of one unleaded enamel, then 2008 then two layers of other unleaded enamel
All tests worked, resulting in the fact that 2008 can be used to achieve the High Fire Webbing Design. Here are my results, the step numbers show the layers. Each layer was fired at about 1450° for about 1.5 - 2 minutes until the last firing which was done at 1600° for 2.5 minutes. Timing varies and one has to look to see if the fusing is done and on the last layer if you have achieved what you wanted (otherwise keep on firing!).
 |
 |
 |
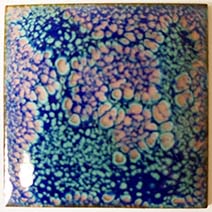
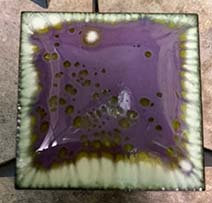
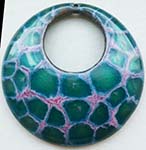
1. 2008 2. 1716 - op. Iris 3. 2680 - tr. Purssian Blue |
1. 2008 2. 935 - Robin Egg Liquid Form Enamel (did show the crackle effect) 3. 2680 - tr. Purssian Blue |
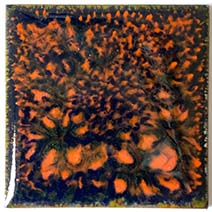
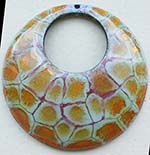
1. 1860 Flame Orange 2. 2008 3. 2240 Tr. Olive Green (this showed some Pull-Through) 4. 2680 Tr. Prussian Blue |
| Note: no Pull-Through was apparent after 2nd firing. | Note: The crackle effect was apparent after the 2nd firing, but I didn't take a photo so I cannot show where it opened up and thus how that affected the last firing. Where you see the heavy dark blue, though, is where there was more solid Robin Egg from the 2nd firing. Crackle enamel will not crack as much when it is thicker and thus these areas probably had thicker liquid enamel. | Note: In this test, the 3rd firing did show Pull-Through. This is a good way to have a base color, not showing the copper, if that is what you want. I do this sometimes while creating a crackle design as the crackle bases are only white, black or clear. Remember - not all clear (flux) enamels turn copper the same color. 2008 turns copper a pinkish color; 2015 turns it a golden color so although it is clear, you can fuse that first and then use the 2008 on top and get the golden color instead of the pinkish color. |
I also ran two other tests using differnt bases...
 |
 |
1. 1020 - op Titanium White 2.2240 Tr. Olive Green 3. 1716 - op. Iris |
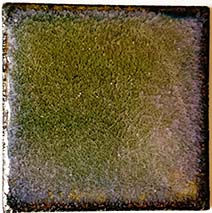
1. 2015 - Golden Clear 2. 1716 - op. Iris 3. 2240 - Tr. Olive Green |
Note: Titanium White is a known soft enamel. One has to be very careful not to fire it too high otherwise you will always get Pull-Through. Especially in scrolling it is a disaster - the Titanium White will envelope all the other colors and you'll end up wtih a white piece! I like this test the absolute best, but it required more firing than I would have thought. At first I fired layer 3 for the normal (see above), but hardly anything Unfortunately, I may never achieve this again. I will try it again and when I do I'll post my finding here (see below) |
Note: I fired the last firing twice. Once was the normal way stated above and the 2nd was at 1630° for 5 minutes. It never opened up to the web design. I had tried 2015 as the base because I've used that with the crackle enamel and although the liquid enamel does not "crack", it sometimes will "pool" and give a different effect. But for this test it did nothing that I could see. oh well! |
 happened except the colors started pulling away from the sides. Then I fired the same timing again and the colors pulled a bit more away and the center started opening (see photo on right), but not down to the white. I finally fired at 1630° for about 2.5 minutes and got the gorgeous piece above. I just love the way the white has the lines which I think is the green running along the white, but I'm not sure.
 Conclusions: My thought is that almost any combination of colors would work as long as there is a soft base (like 2008). I do like using a mixture of opaque and transparents. Keep in mind that opaques, when high fired, could turn transparent (more discussed about this in the book). And sometimes I use more than one color on a layer. One cannot control what you get and so you have to be satisfied with whatever happens. More experimenting is needed as sometimes the web openings are large and sometimes small and Trish and I cannot figure out why one forms over the other. If you figure this out, please contact me! The instructions for the HIgh Fire Webbing Design that is in the book using leaded enamel has a slightly different look. I like that look best (see the moon photo to the right, which also shows overfired white (I used Foundation White)), except for the test using Titanium White.
6/1/2019
Okay, so I needed to make swap pins for The Enamelist Society 2019 conference. Of course I used the high fire technique and while doing it, experimented some. Boy were my results confusing! Here are my 24 pins - 2 sets of testing, in which the 2nd set used a different base, but had the same exact colors on top.
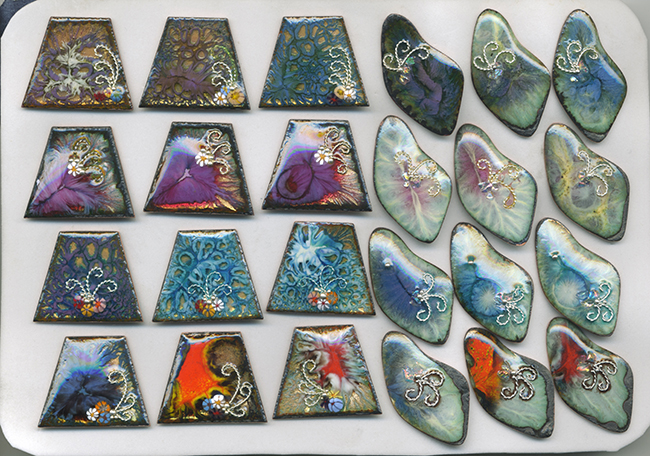
The frist set of trapezoids used the leaded way of doing this and except for the 2nd row, they all worked fine. I'm not sure what happened in this row, the color over the base was Geranium Pink, but as you can see from the 2nd set, 2nd row, I didn't get the same thing! In fact, the 2nd set used Titanium White and I expected to get the gorgeous design I got in my first try with Titanium White. I didn't even get any openings in set 2, but I did get the "lines" on the edges, which I really like. I think maybe I sifted the layers too thick for the 2nd set. So, I will have to try again!
updated 6/29/2019
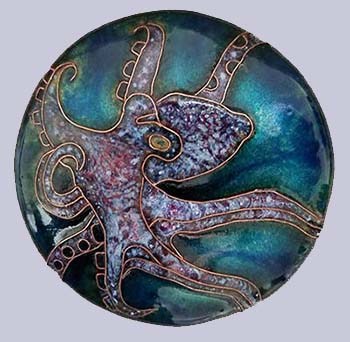
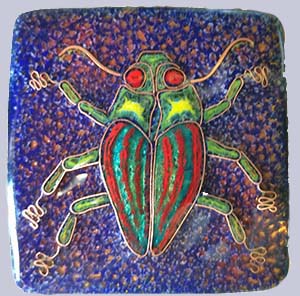
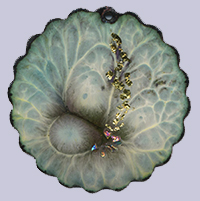
Katharine S. Wood has also been testing with this technique. We both wanted to get it working in Cloisonné and here is what Kathy came up with - I think these are great. As you can see this technique is not just for backgrounds. Kathy teaches at the 92nd Street Y in NYC and has done the Champlevé project in the book. Both pieces are on copper with copper wire. Do not do this with a copper backplate and silver wire because at that temperature you will for sure get the eutectic effect.
The high fire for the octopus was done only in the inside of the wires; the high fire of the bug was done as a background 1st and then the wires were set and cloisonne finished.
 |
 |
6/23/19
I tried another one with Titanium White as the base and it was great. I realize now that the lines generating out are actually the webbing design, but because the background is white, it just looks different. The top of this one has Dichroic Frit Flakes and gold foil. I did fire this one like the 1st - high fire at 1600°F for 3 minutes, two times, then at 1630°F for 3 minutes.
6/26/19
Testing again... when using Titanium White, if you use thin sifting layers of color, they will all be covered by the white and an overfired white color (green/blue) will appear. That is why if you look at the swap pins, the lower parts of the 2nd set have the same "web" design as this piece above. However, I knew I sifted a heavier layer the swap pins and that is why you see the colors that I used. You can play with this information by puttng some heavier sifting in certain areas to ensure you get some other color. Othewise, the colors you use, whether transparent or opaque, do not seem to matter!
In talking with Tom Ellis, he told me that in layerng this, on the last layer, you can add some small lumps (like 6/20) of either 2008 unleaded or almost anything that is vintage Thompson leaded enamel and you will get a surprise! I haven't tried it yet, but when I do I'll post here what happened.
7/22/19
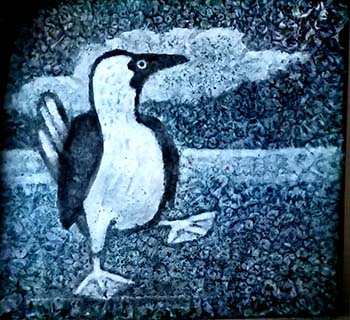
Kathy Wood is playing using this with Grisaille. Check this out:
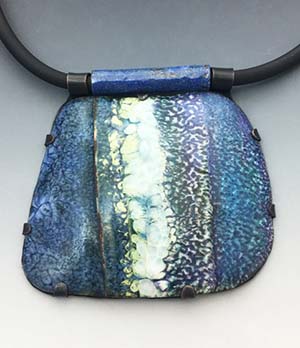
09/11/2020 - this is what Leni Fuhrman did with the instructions from the book and this site on this Foldformed pendant:
High Fire Webbing Design Using Lumps
| Tom Ellis tried to achieve this webbing design using leaded lumps and unleaded enamels. Here is a downloadable version of what he did. This is what it looked like: |
Test 1 |
Test 2 |
Trivets
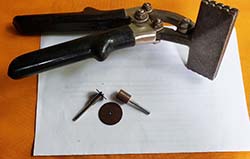
 April Wengren learned a way to inhibit enamel to sticking to her trivets - use regular blackboard chalk! Although some people use kiln wash, April feels chalk is easy to use and works every time. Just rub the chalk on the area of trivet where the piece will rest - easy peasy. Be sure to rub the chalk on both sides of the arm face and on the face of the
 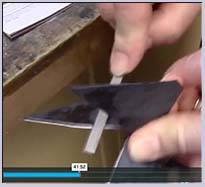 arm itself as in the photo to the right.
April also has another tip - file the edges of the trivet arms with a diamond file to make the edge that touches your piece thinner - thinner = less surface to touch your piece.
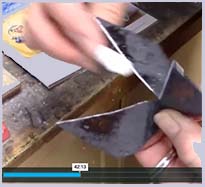
You can watch April do this in one of the videos from The Charmed I'm Sure Studio, owned by Jan Van Brederode.
Enamelist Merry-Lee Rae has a free Tips and Tricks class where her first lesson is to make a knife-edge on the arms of the trivet.
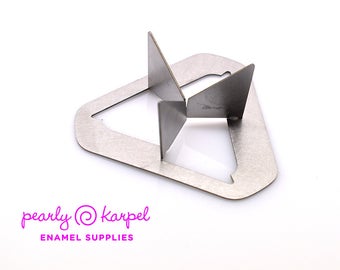
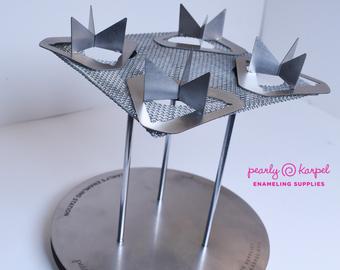
There are many many types of trivets and which one is best is truly a personal issue. I found these trivets that I've never seen before... By Pearly Karpel on ETSY.com. This ETSY store also sells enamels and other related materials.
 Titanium Screens
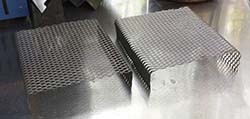
We've all had issues with enamel firing onto our firing racks/screens. This can cause a mess unless cleaned off. Lydia Morrison found a new solution - using a screen made of Titanium which enamel does not stick to. Here is what you can do to make these until a commercial version is available for purchase...
 Buy some Titanium screening, probably a sheet big enough for multiple racks. Here is one link to get a sheet of Titanium screening. Be careful when taking it out of the package because the edges are sharp and you can cut yourself - wear leather gloves!
Lydia says: I used a cut off wheel to cut from the top surface (provides a smoother cut that if cutting from the edge) and a grinding stone on the Foredom to smooth all the edges. I used seaming pliers to bend the legs. Again, wear leather gloves during the entire process.
Small Kiln
Not ready to invest in a regular kiln? You can fire enamels or metal clay in an Ultralite Kiln easily and affordably! This YouTube video by Pam East will show you how.
Mica
Mica is a mineral that can be used during firing to hold an enamel piece instead of a trivet. I used regular mica for 10 years of working with a small beehive kiln while making Cloisonné jewels, so it is very useful. However, it will fire onto enamel and then have to be ground off. But this can be an advantage as it can be used to fire into enamel in various ways - this currently needs experimentation. Mica is the material used in lusters, like from Thompson Enamel, to give a metalic sparkle.
More about mica can be found in my book under the two chapters: Enamelist's Studio; Supplements and Add-ons.
All that being said... there are 3 types of mica that an enamelist can use. Note: mica dissapates (gets flakey) in the kiln so can be used a few times but not forever. Some types last longer than others.
- One is the regular mica that has been sold for over 50 years to enamelists. This was the type I used for so long. it can be split into layers, but not real easily. It does not last for as many firings as the other two.
- The second type is Block Mica and is sold by Enamel Art Supply. i have not tried this (but did buy some), and it sounds great. it's more expensive than regular mica, but like Black Mica, is holds up better in the kiln and is more easily split into layes. Check it out.
- The third type is Black Mica. This used to be sold to enamelists, but no longer at any of the known enamel suppliers. it lasts longer than the regular mica and can more easily be split into layers. At least one place on the web sells it, but I have not tried it so if you do please let me know what you think. Check it out.