
The Decal project in the book describes how to use decals and about firing them. Here is some extra information not included in this project.
Table of Contents
- Custom Decals
- Make your own decals for 3D forms by Jan Harrell
- Decals As Per Pat Nelson - pre-heating ceramic and digital decals
- Storage of Decals
- Videos From AAE Glass
Storage of Decals
Decals are affected by humidity, which is reasonable considering that they are water soluable. Thus they normall come with a protective waxy cover, which needs to be removed before using, but should be left in place until use. But if stored improperly, these covers can adhere themselves to the decal and they are hard, if not impossible, to remove properly. One could try firing with this cover on them as they will burn out in the kiln, but this is taking a chance that the decal will look good. It's better to store them properly... just store your decals in an air-tight plastic bag and they should be fine.
Videos from AAE Glass
AAE Glass, in FL, is on my Resources list in the book and on-line - I buy many decals from this company. Tanya, the owner, has many excellent videos showing the use of her products. See this video on using the Illusion Transfers (type of decal). Remember that one type of decal is Dichroic Slide, which fires on enamel and looks like dichroic glass. You could fire one of these on, then fire on a layer of transparent clear and then fire on one of these Illusion Transfers. But of course there are many gorgeous enamel backgrounds you can use instead - check out the Enamel Application chapter in the book and what I've added on-line. Enjoy!
Custom Decals
Have someone print it for you
There are many places to have custom decals printed and of course you print your own with special paper that fires a sepia color; see Resources list. In addition, there is at least one company that sells a printer to make your own ceramic decals - Enduring Images. It's expensive, but in a group environment it might be well worth the money. This company also will print your custom decal onto various items like plates. Call them at 303-278-8868.
Milestone Decal Art is company who will print custom decals for you. They have a few options so check out their site for details. The price is reasonable.
Make your own decals for 3D forms with Jan Harrell
Really good video on CoolTools.us and YouTube.com on making your own decals using mica powder, enamel fines, Sunshine enamel paints or Mason Stains. In the video Jan uses the matte gel medium but she says the gloss also works.
Check it out on YouTube.com Cool Tools offers a one stop shop for all you need, which is very convenient, but you can probably find some of the materials elsewhere for less.
Jan recommends this company, EZScreenPrint, for buying screens to make your own designs. Use about 110 mesh screens.
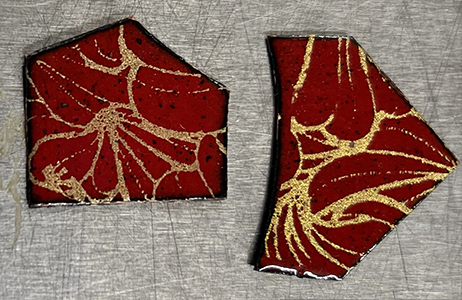
The first time I did this it worked great. But I wasn't sure if I could fire the not-yet-fired decal upside down so I could add counter enamel to my dish and fire that right side up. Thus I did a test - one test was just the decal and then fired again for the counter enamel, the other was to fire the counter enamel up and the decal facing down. Both worked, but I foudn that firing the mica decal a second time slightly diminished the brigtness of the decal. Here are my results - the left one was fired twice and the bottom on fired once - can you see the differernce?

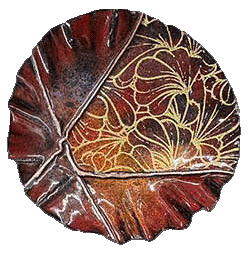
Here is my dish I did on Foldformed metal:

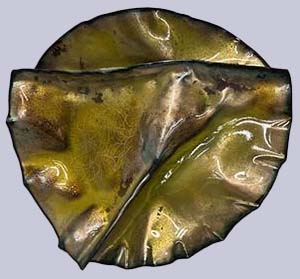
My student, Debbie Kleker, wanted to try it on her Foldformed wall piece. After firing once she decided it was "in her face" so she sifted enamel over it and fired again. This resulted in a much subtler image which she liked. Here it is:

Decals as per Pat Nelson
Patricia Nelson used to teach at Ball State University in Muncie Indiana and specializes in using decals. She is an excellent enamelist, jeweler and educator. Pat works differently than June E. Jasen, who wrote the project in the book (what a surprise!).

Pat has graciously allowed me to post on-line her 2020 documentation on using decals that she uses in classes and describes working with both ceramic and digital decals, also providing a supplier list for commercial purchase or custom decals. This document talks about pre-heating decas before use and gives an older and a new way to do this.
 |
 |
| Edo Brocade by Patricia Nelson Ceramic Decal |
Fan Bubbles by Patricia Nelson Digital Decal |
Notes from Karen: I have used decals since my first book was out and June Jasen wrote a project for them. Most I fire just fine, but the colored ones I always seemed to have trouble with. I hesitated doing Pat's extra steps of pre-heating these decals because June doesn't do it and she has total success. However, I decided to try it with a new set of decals I was having problems with. Well, this totally solved my problem so I am a big fan of pre-heating ceramic and digital decals as per Pat's instructions above. I did find that my toaster oven was running high (be sure to check this with an oven thermometer first) (be sure to use a dedicated toaster oven not used in cooking as you never know what fumes might be in the appliance so it's better to not sure for cooking), so after pre-heated treatment my decal discolored and I thought it was ruined, but I tired the final kiln firing anyway and it was gorgeous! See here...
 |
 |
| Discolored after firing at 200° for 1 hour and at 450° for 1 hr Note that even the white spots went away |
Fired in a kiln as per Pat's instructions |